
What is the plantar plate?
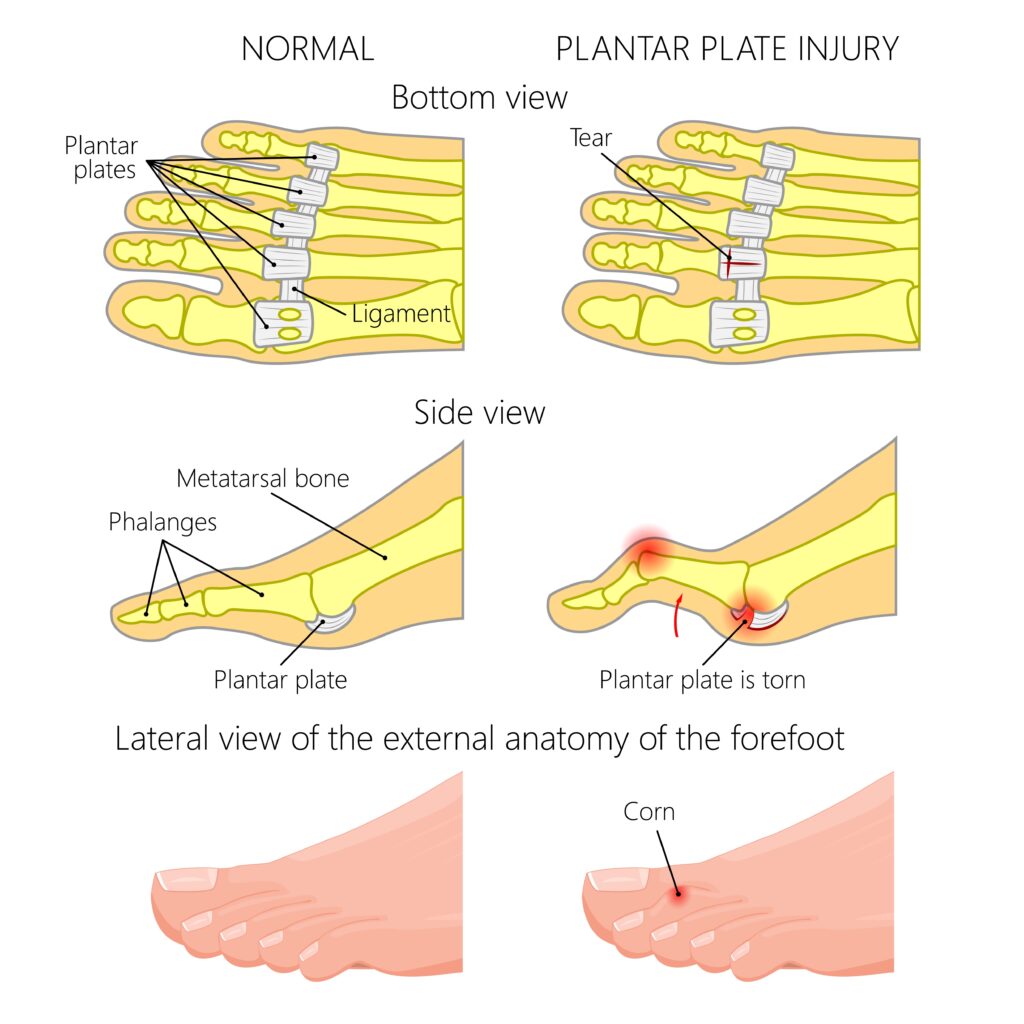
The plantar plate is a ligamentous structure which lies beneath the metatarsophalangeal joints of the lesser toes. This structure helps support and stabilise these joints during walking and activity.
What is a plantar plate injury/ tear?
A plantar plate injury occurs when there is disruption to the ligament structure which can be mild, moderate or can lead to complete rupture of the plantar plate.
- In mild cases, there may be some joint swelling and loss of toe grip.
- In moderate cases, there may be some mild laxity in the toe joint.
- In severe cases, there may be instability within the joint and can lead to a crossover toe deformity where the toe will deviate to lie over the adjacent toe.
This injury occurs most commonly in the second toe joint but can also occur within the third, fourth and fifth joints. Injuries can be:
- chronic – in which they develop slowly over time
- acute – where there is a sudden injury
Plantar plate injury is seen as a common problem of the forefoot. There is a higher incidence of plantar plate injuries in women in comparison to men at a ratio of 10:1. Injury is more common over the age of 50 years.
Causes
There are a number of risk factors for developing a plantar plate injury;
- Age – these injuries are most common in the over 50s.
- Gender – it is more common in females.
- Weight – if you have a higher than average BMI you are more at risk.
- Strength – poor strength within the core foot muscles and lower limb.
- Footwear – soft, flexible soled footwear provide little support in the forefoot which can increase the stresses going through the small joints of the foot. Wearing footwear with a high heel also increases the stress on these tissues.
- Altered foot function – The presence of existing foot deformities such as hallux valgus (bunions), a long second toe, flat feet or joint laxity within the joints of the foot can all lead to overloading within these joints.
- Inflammatory arthritis – Many inflammatory joint diseases (for example rheumatoid or psoriatic arthritis) affect the small joints in the foot making them more vulnerable to this condition.
- Sporting activities – certain sporting activities increase the load on these small joints such as running and jumping.
- Occupation – certain occupations may lead to greater strain on these joints.
Symptoms
The most common symptoms that people complain of if they experience a plantar plate injury are:
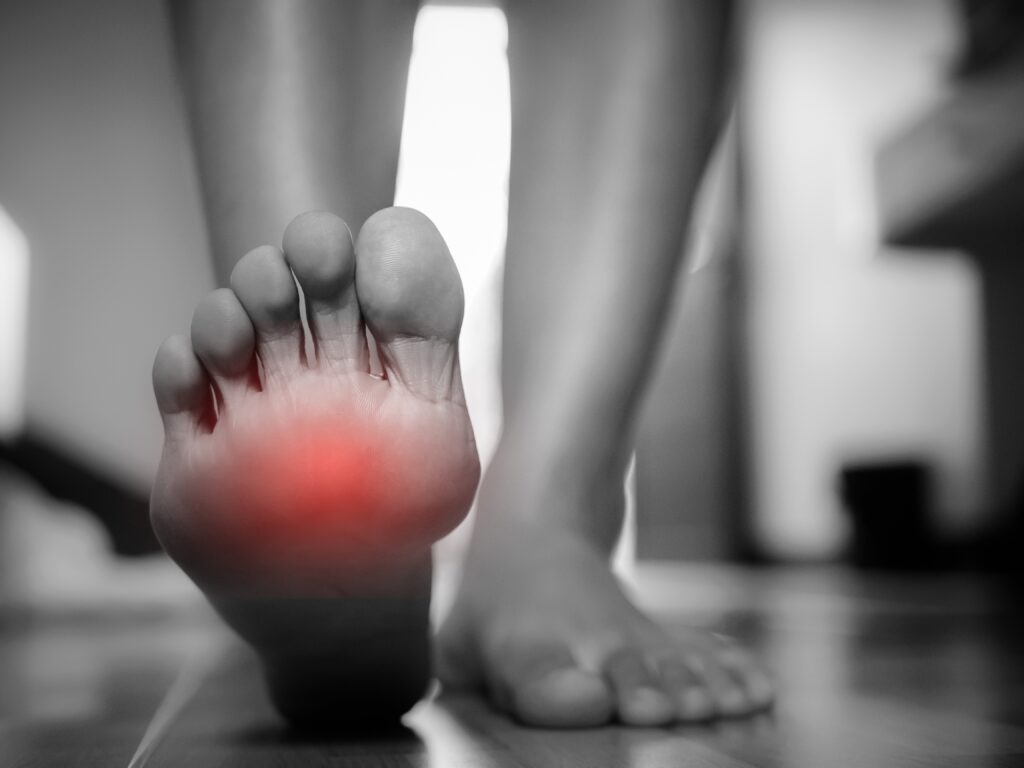
- Pain in the ball of the foot under the metatarsal head. Patients describe the feeling of walking on a stone or marble.
- Deformity of the toe with either clawing or splaying of the toe. In the later stage of the injury the toe may cross over the next toe.
- Rubbing of the top of the toe from footwear.
- Pain and swelling of the toe joint due to joint inflammation.
- Hard skin may develop on the ball of the foot.
- Reduced strength within the affected toe.
How long will it take to get better?
There are no quick fixes for a plantar plate injury as ligament injuries within the foot can take 3-6 months to heal. However with exercises and lifestyle changes you may see improvements in your pain and walking earlier and help prevent a deterioration of your injury.
What can I do to help my plantar plate injury?
Treatment is aimed at reducing the stress or load through the affected joint to allow the ligaments to heal and improving strength around the affected joint. Changes in lifestyle can also be helpful to aid in your recovery.
The one person who can help you manage your symptoms is you.
Footwear
One of the most important changes you can make is to your footwear.
- Avoid walking in bare feet until your pain has resolved
- Avoid high heeled shoes or shoes with a flexible sole as these place increased stress on the joints of the forefoot.
- Avoid shoes which cause you to claw your toes such as flip flops / mules / crocs.
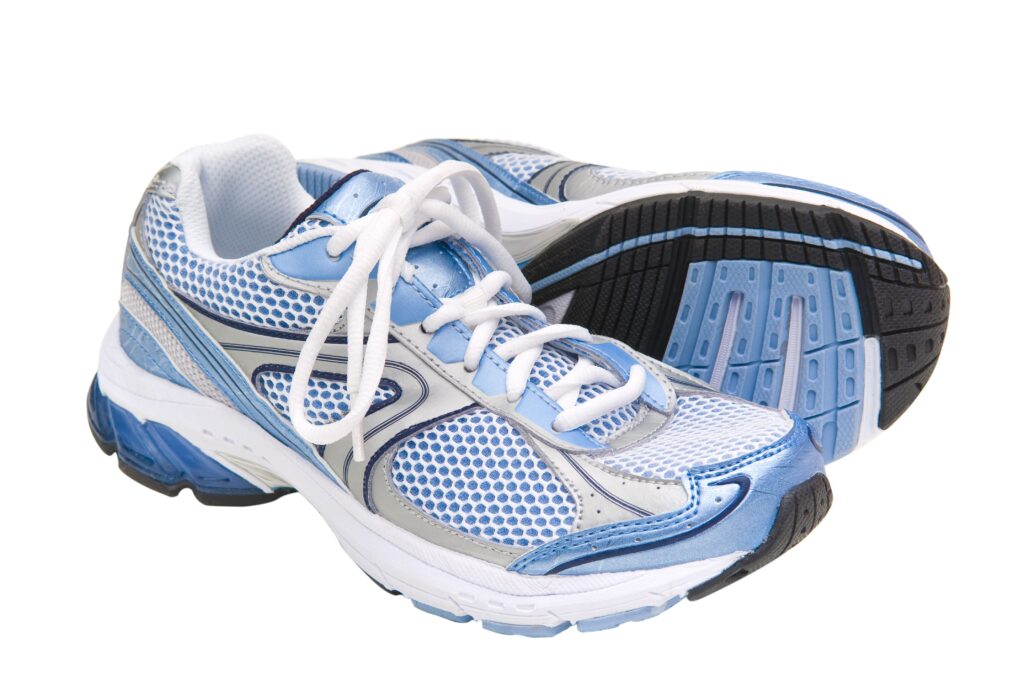
Look for a shoe that has the following qualities;
- Heels should be broad and no more than 1.5 inches high.
- Soles should be firm and non-pliable.
- Deep fitting footwear will provide plenty of room for your toes and accommodate any potential toe deformity.
- Lacing or Velcro straps to hold the shoe firmly to the foot. E.g. running or walking shoe
- A rocker at the forefoot can limit bending of the joint during gait and therefore reduce pain – see picture below. See our footwear advice video or our footwear advice section for further guidance.
Strapping
Strapping of the affected toe can reduce pressure and pain levels and aid the healing process.
Strapping can be in the form of:
- self applied tape
- purchasing an over the counter device to hold your toe in place
Strapping is recommended for a period of 4 to 6 weeks following your injury or until your symptoms subside.
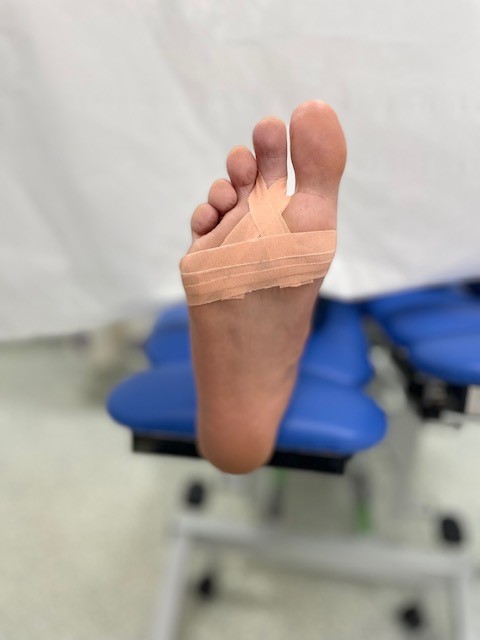
Self-applied taping
To tape your toes, please follow these steps:
- Ideally, you need a length of tape measuring approximately 8-9 cm long and 1 cm wide.
- The tape should be threaded between the toes, placed over the base of the affected toe and again threaded between the toes on the opposite side.
- The toe should be brought down to align with the rest of the toes. It is important not to bring the toe down too far or apply the tape too tightly, that it impairs the circulation.
- The two lengths of tape are crossed over in to a ‘V’ shape under the ball of the foot.
- Further strips of tape are used to secure the strapping to the ball of the foot. Ideally this strapping should be replaced every 2-3 days.
Strengthening and Stretching Exercises
Targeted strengthening and stretching exercises for the muscles in and around your foot and ankle can help to improve your symptoms. Local NHS Ayrshire & Arran podiatrists have devised exercise videos to help with strengthening the correct muscles.
Ice
Icing can be beneficial in the first 2 to 3 days following injury or to help manage any flare ups of pain.
Some people do find continual benefit of regularly icing for several weeks following the injury.
Weight Management
If you have a higher than average body mass index (BMI) you are more at risk. See our weight management section for further guidance.
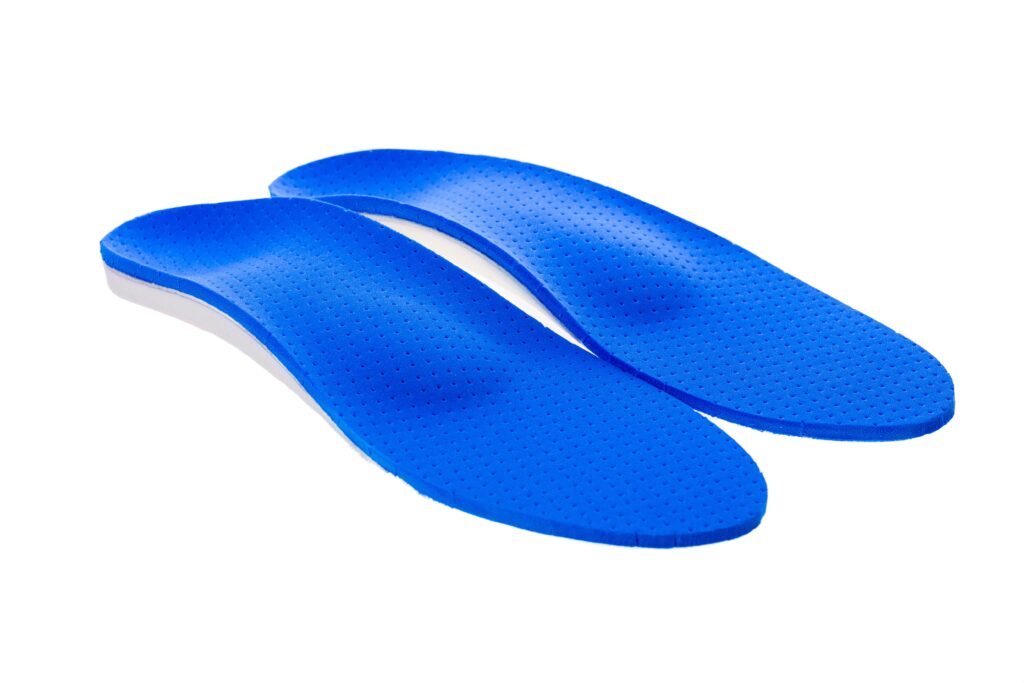
Foot orthoses
Foot orthoses may be considered if self-management and exercises have not improved your symptoms.
Your local MSK podiatrist may prescribe some foot orthoses to wear in your shoes to try and offload the joint. Relief can be felt from a stiff, firm insole or one which provides a metatarsal support at the painful joint.
Investigations and surgery
Do I need a scan?
A plantar plate injury is usually diagnosed primarily via a physical examination and patient history.
Your clinician will put stress on the ligament and joint to test its integrity. X-rays and additional imaging tests such as diagnostic ultrasound scans can also be used to confirm a plantar plate injury, if required.
Will I need surgery?
Surgical management is not usually considered unless your injury is severe or you have tried all of the above measures and continue to have difficulty walking.
If all non surgical treatment has failed or you have developed a fixed toe deformity then it may be appropriate for a referral to an orthopaedic surgeon to consider a surgical intervention.
Plantar Plate Exercises
The exercises in the videos below have been provided to help with your Plantar Plate injury. If there is any doubt about your fitness to do these exercises then please discuss this with your GP.
You may find that these exercises may slightly increase your symptoms initially. However you should find the exercises themselves will become easier to do and that you begin to move your foot and ankle more easily. The exercises can take up to 12 weeks for you to notice a great improvement.
Please note: If these exercises cause a large increase in your pain or after 12 weeks there are no noticeable changes in your day to day symptoms then please contact your GP or NHS inform for more advice.
For more general exercise advice around walking, modifying activity levels and pain flare up management, please click here.
Pain during exercise
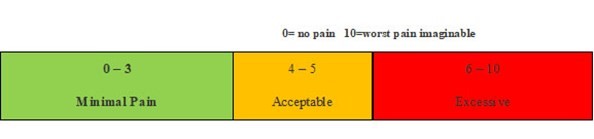
Within the scale, aim to stay in the green or amber boxes. If you are in the red area then you can modify the exercises by:
- reducing the amount of movement during an exercise
- reducing the number of repetitions
- reducing the weights
- reducing your speed
- increasing rest time between sets
Pain after exercise
Your pain or other symptoms should return to your pre-exercise baseline within 30 minutes of exercising. On the morning after your exercises, you should not feel an increase in pain or stiffness that lasts longer than 60 minutes.
Disclaimer
Please note: These exercises should not be used without prior consultation with a medical professional as the use of the wrong exercise may cause additional health related issues and discomfort. NHS Ayrshire & Arran and MSK NHS Ayrshire & Arran are not liable or responsible for any harm, losses or damages whatsoever resulting from the use or misuse of the information contained in or implied by the provided information in each video. These are provided for information only.
If you have any concerns about your ability to perform exercise then please discuss your concerns with your doctor or healthcare provider prior to participating in any advice that is on the MSK NHS Ayrshire & Arran website.
It is recommended to use your ice pack (cryocuff) or cool pack after your exercises to reduce the pain and discomfort this may cause.
Please choose the most relevant exercise section for you.
Choosing the most relevant exercise section for you:
- Section 1 – Stretching
- Section 2 – Strengthening
Section 1 – Stretching
Calf Stretching Exercises
Stretching the muscles in your calf is important to maintain range of movement at your ankle and reduce the stress placed on your toes. It is advised to carry out these stretches in both legs throughout your rehabilitation.
Exercise 1 Towel Calf Stretch
Part A) – Seated Towel Calf Stretch (Gastrocnemius)
This exercise is aimed at stretching your calf muscles. To begin place a towel around the ball of the affected foot, keep your heel in contact with the ground and avoid bending your knee. Pull the towel toward you until you feel the stretch in the bottom of your foot and back of your calf muscle. Hold the stretch for 30 seconds and repeat 3 times with a small rest period between stretches.
It is particularly useful to perform the stretch first thing in the morning or after a period of rest.
Repeat 3 times per day.
NB: If you feel this stretching exercise is making your condition worse the please focus on performing the exercises which are marked as strengthening.
(Part B) – Seated Towel Calf Stretch (Soleus)
This exercise is aimed at stretching deeper in your calf muscles. To begin place a towel around the ball of the affected foot, keep your heel in contact with the ground and bend your knee. Pull the towel toward you until you feel the stretch in the bottom of your foot and back of your calf muscle. Hold the stretch for 30 seconds and repeat 3 times with a small rest period between stretches.
It is particularly useful to perform the stretch first thing in the morning or after a period of rest.
Repeat 3 times per day.
NB: If you feel this stretching exercise is making your condition worse the please focus on performing the exercises which are marked as strengthening.
Exercise 2: Standing Calf Stretch (Gastrocnemius and Soleus muscles)
Part A) – Standing Calf Stretch (Gastrocnemius)
This exercise can be done with or without a towel. The towel can be helpful to guide foot placement to make the stretch more effective. For this video we have used a towel. There are two parts to this stretch so all the muscles in your calf can be targeted.
Place your hands on a wall for support and take a step back with the affected foot. If using a towel place your first toe and the inside arch of your foot on the towel with the outside of your foot and the heel on the ground. It is important that the heel of the back foot remains on the ground throughout this stretch, additionally try to keep the toes of both feet pointing straight towards the wall rather than rotating the foot so that the toes are pointing outwards. Now begin to bend the knee of your front leg whilst moving your chest towards the wall until you feel a stretch in the back of you calf muscle, hold for 30 seconds and repeat 3 times with a small rest period between stretches. Repeat on the opposite leg also.
(Part B) – Standing Calf Stretch (Soleus)
The second part of this exercise is aimed at stretching a different region of your calf (the Soleus muscle). Adopt the same starting position as you did for the previous exercise. Slide the affected foot towards the front foot as demonstrated. This time when bending the front knee, also bend the knee of the back leg until you feel a stretch deeper in the calf muscle. Hold this for 30 seconds and repeat 3 times. As before be sure to keep your heels in ground contact throughout the stretch. Repeat on the opposite leg also.
Repeat 3 times per day.
NB: If you feel this stretching exercise is making your condition worse the please focus on performing the exercises which are marked as strengthening.
Section 2 – Strengthening
Strengthening Exercises
Often when people have signs and symptoms of a Plantar Plate injury it is important to strengthen the small intrinsic muscles of the foot, strengthening these muscles help your foot to function better and put less stress on the ligaments supporting your toe joints (metatarsal phalangeal joints).
Exercise 1: Toe Grip strengthening exercises using a ball
Video
This exercise is done using a small spiky ball as seen in this video, however if you do not have one try using marbles or a pencil. This exercise helps to strengthen the small intrinsic muscles within your foot. To do this exercise try to grip the ball with your toes and keep repeating this action. If you get a good grip on the ball try to pick it up. Don’t worry if you can’t, it’s the gripping action that is most important.
To start with aim to grip and pick up 15 times, slowly increase this to 3 x 15 grips and pickups as you become fitter and stronger.
On occasions when first starting to perform this exercise you may experience a little cramping within your foot. Should this happen, rest for a minute and try again. As you get better at performing this exercise any cramping should cease.
Repeat once per day.
Exercise 2: Toe grip Strengthening Exercise with towel
Video
This exercise strengthens the small intrinsic muscles in the foot. To do this exercise place a small towel flat on the ground. This exercises is performed in a seated position make sure your back is straight and leg bent comfortably at 90 degrees with your foot placed flat on the towel. Use your toes to begin crunching the towel up with the aim of pulling the towel in towards you, do this in a slow controlled manner whilst maintaining your heel on the ground. When you have pulled the towel in as far as possible straighten it back out again and repeat the process between 3-5 times to start with. Make sure your heel stays in ground contact throughout the exercise.
Aim to build up slowly to 15 repetitions daily.
Exercise 3: Toe Raises
This exercise strengthens the toe extensor muscles in the foot and helps with toe co-ordination. This exercise is performed in a seated position. Place your feet flat on the ground.
Video
Lesser Toe Raises – Keep your big toe touching the floor and lift the other toes. Relax the toes back to floor. Repeat 15 times.
Big Toe Raise –Start in a seated position, with feet flat on the floor. Keep your lesser toes touching the floor and lift the big toe. Relax the big toe back to floor. Repeat process 15 times.
This exercise may be tricky to start with, if you find it difficult to co-ordinate your toes, use your fingers to stabilise either your big toe and move your lesser toes, or stabilise your lesser toes and move your big toe. Persistence over time will allow you to develop the co-ordination and strengthen your toe muscles at the same time.
Do this exercise once per day.
Exercise 4: Resistance band –Toe Flexor Exercises
Video
This exercise strengthens the toe flexor muscles in the foot. This exercise is performed in a seated position make sure your back is straight and leg bent comfortably at 90 degrees with your foot placed flat on a strip of resistance band. Pull the end of the band over your knee towards you which in turn will pull your toes up into a flexed position. Anchor the band on your thigh maintaining a good level of tension on the band throughout the exercise. Hold the band tight and begin to slowly push your toes down towards the ground against the resistance of the band, when your toes reach the ground allow them to slowly raise back up to their starting position.
Aim to build up slowly to 3 x 15reps. You can adjust the difficulty of the exercise by creating more or less tension on the band. Make sure your heel and ball of foot stays in ground contact throughout the exercise.
Do this exercise once per day.
Exercise 5: Short foot exercises
(Part A) – Seated Short Foot Exercises
Video
This exercise helps to strengthen your core intrinsic foot muscles which help with strengthening the arch of your foot and balance. To do this exercise –Start in a seated position with your foot flat on the ground. Straighten your toes and press them gently into the ground whilst sliding the ball of your foot back towards your heel and lifting the arch of your foot. Be careful not to claw your toes whilst doing this exercise or lift the ball of the foot off the ground.
Aim to hold this position for 5 sec and relax, repeat 15 times. Aim to build up slowly to 3 x 15reps.
Repeat this exercise once per day. (To progress this exercise, do this same exercise in the standing position -See standing short foot exercise).
(Part B) – Standing Short Foot Exercise (progression)
Video
This exercise helps to strengthen your core intrinsic foot muscles which help to stabilise the arch of your foot and help with balance. The standing short foot exercise is a progression from seated short foot exercise. To do this exercise – Start in a standing position and straighten toes and press them gently into the ground whilst sliding the ball of your foot back towards your heel and lifting the arch of your foot. Be careful not to claw your toes whilst doing this exercise or lift the ball of the foot off the ground. Stand close to a wall or hand rail to aid with balance if required.
Aim to hold this position for 5 sec and relax, repeat 15 times. Aim to build up slowly to 3 x 15reps.
Repeat this exercise once per day.
Exercise 6 – Standing Ankle Forward Leans
Video
This is a weight bearing strengthening exercise for your small intrinsic muscles in your foot. Stand near to a wall to aid with balance if required. Have your feet hip width apart. Gently lean your body forward from your ankle joint, your toes should have to press down into the ground to help hold you up. As you lean forward you should feel a light tension in your abdominal muscles and the backs of your legs. Move as one unit making your feet do the work without pushing your hips forward or back. Push down with your toes to return to the starting position. Hold the forward lean for 5 seconds. Repeat 15 times. Aim to build up slowly to 3 x 15reps.
Repeat this exercise once per day.
Click here for a printed version of these exercises.